|
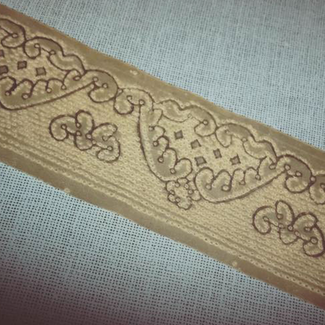
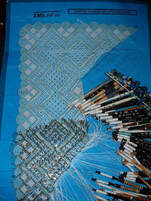
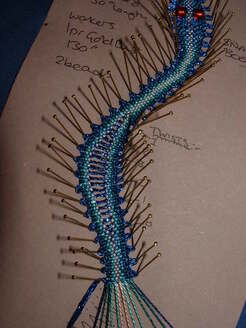
Why do we prick out patterns? Pre-pricking a pattern ensures that your lines are clean and straight. It is easier to get accurate holes for your pins, when you pre-prick. So, if your lines aren't as smooth as you would like, think about pre-pricking.  Traditional parchment pricking dating from the late 18th Century / early 19th Traditional parchment pricking dating from the late 18th Century / early 19th Traditionally lace patterns or prickings were made onto parchment and I have a number of these dating from the end of the 1800s / start of the 1900s. During the lace revival starting in the 1970s, people would take rubbings of older prickings then true them up - because you put pins in the holes, the holes can get enlarged or because they were copies of copies then the lines were not straight. Truing meant that the lines were straightened and the pattern 'restored'. Before photocopies and home printers were the thing, most books of lacemaking suggested that you traced the pattern from the book then made the pricking. Glazed card was (and still is) sold as pricking card. The idea is that this is heavy enough to hold the pin hole and not deform with usage.  Photocopy with blue film over it Photocopy with blue film over it As tech has advanced, we now can use self adhesive film to cover a photocopy or laminate. For me, a one off pattern that I'll not make again, I may well cover with film. Just as for extremely complicated patterns that are hard to draw the lines in after pricking, then I'll photocopy and cover with film. However, my preferred way of creating a pricking is to take a photocopy and prick through the pattern onto the card, then draw in the lines with a fine line permanent marker. I have patterns that I made when I started, back in the 1980s, that I still use because they are robust. I often use foolscap manilla folders for my pricking card as these are easy to come by and fold out to a large area. The other advantage of pricking through the pattern, directly onto the card is that you can make multiple copies of a pattern, at the same time. Layer up the card stock, pin the pattern onto the top and prick through. Then you draw the lines on to each pricking. This is useful when making a pattern for yardage (or a repeating pattern) such as a garter, or if you are creating multiple patterns for teaching or 'have a go' pillows.  A Spanish pricking that was supplied on orange card A Spanish pricking that was supplied on orange card The use of coloured film is supposed to help ease the eyes however, it's worth thinking about printing onto colour card or using coloured film as different coloured threads can work better or worse depending on the backing colour. Black thread on blue or green can disappear, which is why Spanish lacemakers often use an orange card. You can print directly, these days, onto card. If your printer will take the heavier pricking card, this can be a godsend. Louise West has developed a laser pricker which she uses after first laser printing the lines of the pattern onto card.  Christine Springett's snake pattern, traditionally pricked with the details of the pattern marked on with permanent fineliner Christine Springett's snake pattern, traditionally pricked with the details of the pattern marked on with permanent fineliner However, before you start printing every pattern in your collection out on card, check that your printer ink is waterproof by rubbing a damp finger over it. If the ink comes off, then it is likely that it will leech onto your work and discolour it. This is why traditionally, mapping ink or permanent markers were used to add in the lines. Going back to a more traditional way, taking a photocopy of the pattern, rubbing beeswax over it to ease the pricking, then pricking through onto your card and adding in the lines with a fine liner is still one of the better ways to learn a pattern whilst being more ecologically minded. Then you can take the photocopy and compost it.
0 Comments
|
From time to time I post on different groups and wanted to collect some of the advice that I give in one places.
Categories
All
Archives
November 2022
|
