So, down to the nitty gritty ... 1) Is this book 'desirable'?
Often booklets or self published books were limited print runs. But, if no one wants the book then just because a book was a limited run, doesn't make it worth a vast amount of money. In the book blog, I've annotated each entry as to whether or not it's still in print. If you can't find the book that you are looking for then remember, it's a work in progress. Fill out my contact form with details of the book and if I have it in the library I'll push the entry to the top of the list for you. 2) Is this book still in print?
3) What is this book worth?
Some books though, remain very highly priced regardless of trends.
And finally ... If the book has prickings in it on a separate sheet, always confirm whether or not that sheet is included. Nothing worse than buying a book to find out you can't make the patterns because they are missing.
0 Comments
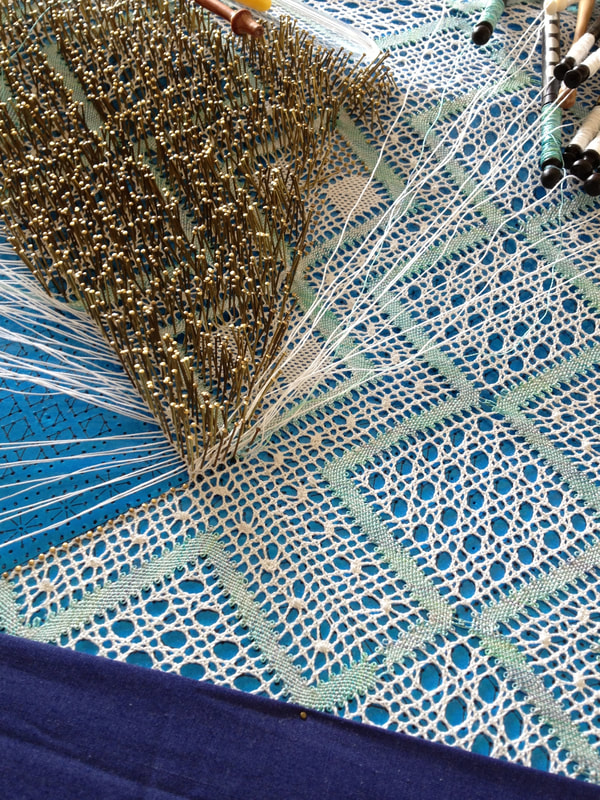
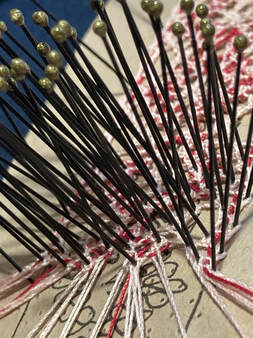
Over the years, it has become increasingly difficult to obtain good quality brass pins. As the industry declined, many lacemakers have moved to using stainless steel or nickel plated brass
You can tell that a pin has steel in it because it can be picked up by a magnet (that is the iron that the magnet is reacting to). Our hands, the air, even straw or sawdust pillows naturally have moisture in them. For short periods of time, a few weeks or so, the pins will be fine in the pillow. However, the issue starts when the pins are left in the pillow for extended periods of time. The first indication will be that the pins don't want to come out of the pillow easily, then you start to see spots on the pins finally, spotting on the lace.
Want to know about pins?
If you are in the UK, then plan a visit to the Forge Needle Museum or read about pins at Brian Lemin's website
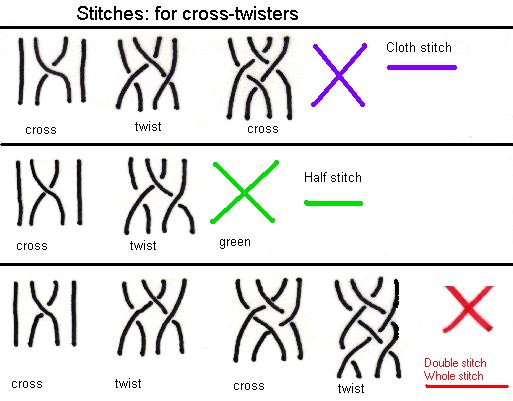
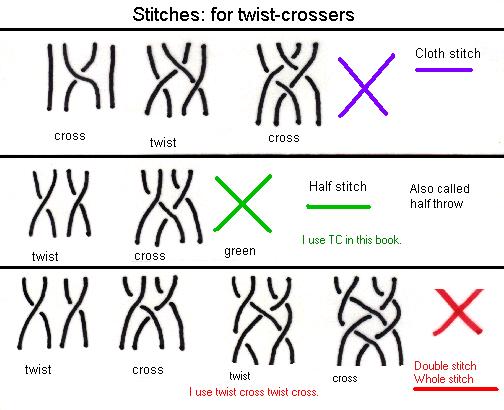
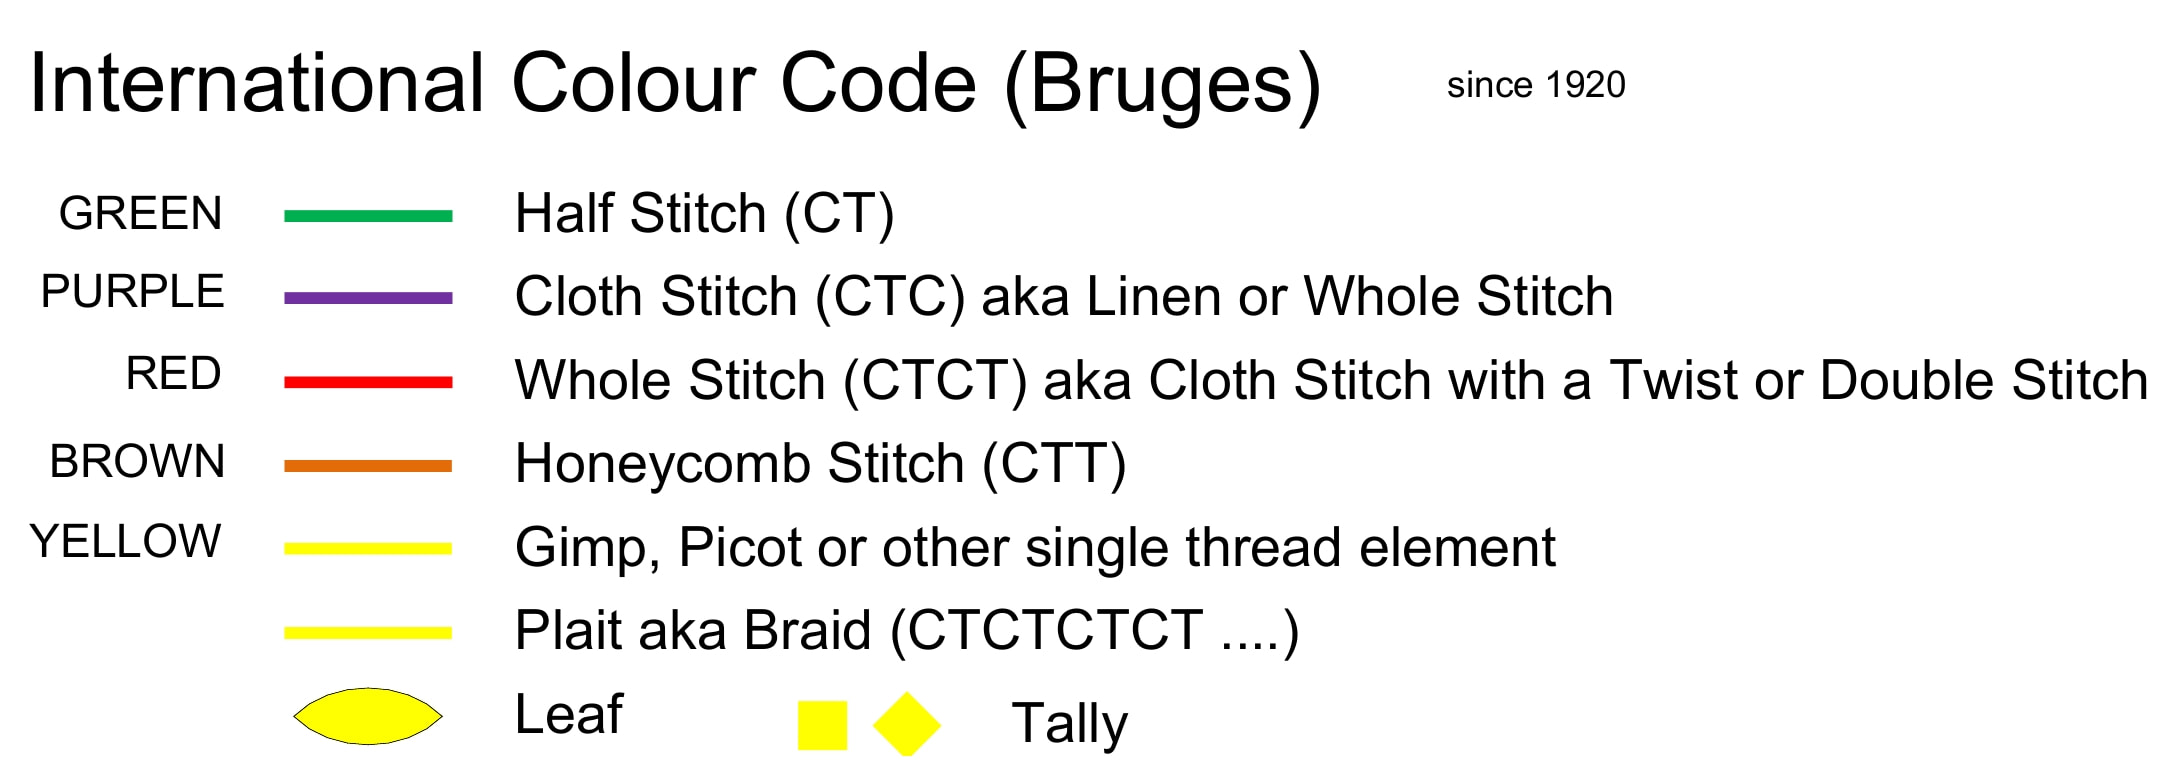
So far, so good? Not really, because when I learnt, cloth and whole stitch were interchangable as terms and Cloth Stich & Twist was described as Cloth Stitch & Twist or Whole Stitch and Twist.
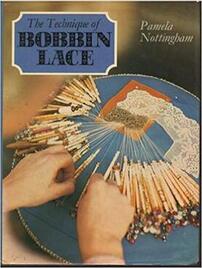
Now, there were a number of reasons that the International System didn't take off and the main one was limitations on printing. During the resurgence of lacemaking in the 70s and 80s, colour printing was exceptionally expensive. Most designers would only have a colour cover and maybe one or two colour plates in their books. This wasn't an issue for looking at the lace patterns and finished articles because most, if not all the lace was made in the traditional white or black and the prickings were black dots. Around the mid 90s, dual colour because easier to do so we started to see the addition of blue into the printing of a number of books, most noticably Pamela Nottingham's later books. This was followed by tri colour printing and we started to see red included in Geraldine Stott's and Bridget Cook's later books. With the opening of the EuroTunnel in 1990, it now became easy for lacemakers in the UK to take a train to Belgium and holiday in Bruges, giving access to the Kant Centrum and attend OIDFA events in Europe. Towards the end of the 90s, access to international books was also becoming much easier in the UK due to international lace suppliers attending events like the National Lacemaker's Fair at the NEC and teaching at summer schools. Interest in books from outside the UK grew and UK lace suppliers found it easier to obtain books from publishers such as Barbara Vey. It was around this time that multicoloured printing took off and we started to see the International Colour Code being used more and more in books and people started to realise that terminology isn't global. So, the use of C and T became the international language on many of the newsgroups such as Arachne so that lacemakers could talk to each other and understand what was being discussed.
Having just picked up some lovely bone bobbins on ebay, I thought it might be time to offers some advice about buying second hand modern bobbins. So here are my top tips on buying second hand on eBay (and elsewhere) 1) Is this bobbin still available from the original turner / painter at a reasonable price? Supporting our artisans is good karma, but obviously if it's a bargain then you are going to buy the pre-loved bobbin. Don't forget to check out 'find the maker' if you want to identify the maker is 2) Is the bobbin good value? If you have a budget, then set your limit according when bidding. It's really easy to get carried away and bid way over the top 3) Is this a private seller or a dealer? Always check out the other bobbins that the seller has on sale. There are starting to be a number of sellers who are effectively dealers, but pretending to be private sellers. They buy new bobbins from current artisans and then put them straight on to eBay with a markup. I don't believe in Caveat emptor - Buyer beware. If you then unsure about a purchase talk with one of the most experience lacemakers in the lace Facebook groups. You are more than welcome to message me. 4) Take a good look at the photos.
Fuzzy photos may be someone who isn't good at taking them or it may be an attempt to cover up a less than wonderful bobbin that has a fault. There is nothing stopping you contacting the seller to ask for more photos, or information, if you are really interested
In the past, I have had people borrow a book and not return it. So, I now simply say no. Many of my books are out of print and irreplaceable. I use them as a resource for my students to look through and loosing such books would impact them as much as me. So, what about just copying a pattern from one of my books or single patterns? The answer is still no.
What about out of print patterns and books that you can't get hold of? Well, they are covered by copyright. Now here is my disclaimer about what I'm going to say next. NAL - I am Not A Lawyer. I'm someone who respects UK copyright and am offering suggestions below as to resources that may help others. I am specifically discussing UK law here, however, if the book or pattern was published in the UK, or you are based in the UK, then UK law takes precedent. So, if your home country says that the law is more lax, unfortunately, the higher rules in the UK trump your home laws. As with anything pertaining to the law, if in doubt, seek advices from a professional. For any book or pattern published in the UK or sold in the UK, then copyright extends for the life of the author plus 75 years. But I just want a copy of one pattern Doesn't matter. If it's covered by copyright then making a copy and giving it you breaks copyright. You are stealing the intellectual property of the person who designed it. But you can copy up to 10% without breaking copyright No you can't. That is a common quote that people say that has no basis in copyright law. If copying is permitted, it is stated in the UK and US for example as 'fair usage' which is commonly taken to mean no more than 10% but I fact this refers to quoting a book in academic work. But you are allowed to copy the patterns from a book to make them yourself, why can't you make a copy for me? The designer grants the book owner permission to copy the patterns for personal use, so that you can make the lace. It would be rather difficult to buy a book of patterns and not be able to copy them and make prickings. What the designer did not give permission for, is for you or me to copy the patterns and give them away to other people.
I'm not charging anyone for the copy so that's ok then? No it's not. Paying or not, it doesn't matter. You are prohibited from passing on copies. Just because you don't profit from the copy doesn't make it ok. You are still effectively stealing someone else's intellectual property by passing on unlawful copies I can't get the pattern I want, but I've got a great photograph of it so I'll just make my own pattern by working the photo or creating my own pricking and it will then be my pricking. You can and you can't. Working from the design to learn the pattern .. That's ok, you are allowed to do that under educational purposes, however you cannot share the pattern you have created or sell the lace you have made because they are covered by the copyright of the original pattern. The pattern and the images of that pattern are covered by copyright. You can't just go and nick someone else's work. It is stealing! If I change 10% of the pattern, then I'm not breaking copyright and it's now my new pattern That would be a nope, nope, nope. This 10% thing is terrible and keeps being rolled out. There is nothing that says changing a bit revokes copyright. So, here is a quick summary of the top ten myths on copyright
Resources
|